Repairing toilets
Of all the appliances in our homes, toilets use the most water. Toilets are also the most common cause for household leaks. Replacing older, high flow toilets with low flow models and checking for and repairing leaks regularly are an important part of reducing your household’s water use.
Since we pay for all the water used in our homes – including water lost to leaks – homeowners should check their toilets at least once every six months for issues. This can be done by monitoring water bills for unexplained changes in water use, using water meters as a tool to detect household leaks and taking the Leaky Toilet Test.
Homeowner Water Guide
Discover a library of tips and tools for creating a water-efficient home.
Finding and Repairing Toilet Leaks

Step 1: Determine the location of a possible leak
- Look at the water line. If it’s below the overflow tube, go to Step 2.
- If water is spilling into the overflow tube, go to Step 5.
- Have a dual flush toilet? Complete the leaky toilet test in Step 2, then follow the instructions for dual flush toilets below.
Step 2: Find the cause of the leak
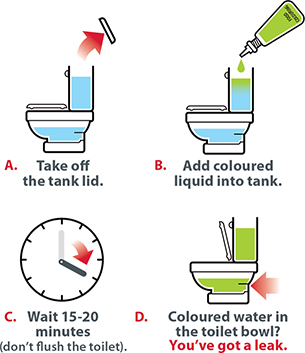
Take the Leaky Toilet Test to find out if your toilet is leaking.
- A. Remove the tank cover.
- B. Put several drops of food colouring (or another coloured liquid you have in your home like coffee or tea) into the toilet tank.
- C. Wait 15-20 minutes.
- D. Look in the bowl. If the water changes colour, you’ve got a leak.
If coloured water appears in the bowl after 15-20 minutes, it means your toilet valve is leaking. Go to Step 3.
Was there no coloured liquid transferred into the bowl? The problem might be the toilet flush handle. Go to Step 4.
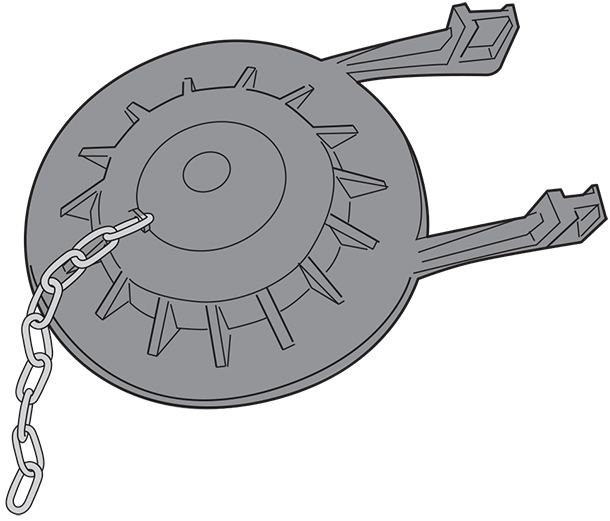
Step 3: Repair the flapper
A worn out flapper is the most common culprit for a leaky toilet. Besides the coloured liquid test, there are other ways to you know if your flapper is ready to be replaced. Simply rub the bottom of the flapper with your finger. If you see streaks of rubber, it’s ready to be replaced. If the flapper used to be soft and flexible, but is now hard, it’s time for replacement.
- Shut off water at the valve. This is usually located on the wall behind or beside the toilet.
- Flush the water that is in the tank and note the length of the flapper chain attached to the handle and the flapper. (Remembering this length will save you time when you install the new flapper.)
- Remove the old flapper, install the new flapper into the toilet and adjust the chain length as it was before you took the old flapper off.
- Check the valve seat for corrosion or mineral build up and clean it if necessary. Dry the valve seat and sand it smooth with fine sand paper. Be careful to not cause any damage or large scratches that could lead to more leaking.
- Turn on the water at the supply line and do the leaky toilet test again to ensure the leak has been repaired.
Step 4: Repair chain and/or flush handle
Does your toilet keep running unless you jiggle the handle?
The chain that controls the flapper might need to be adjusted for the flapper to sit properly on the valve seat. The chain may also be getting caught on something or may have a kink in it, which can result in intermittent leaks that may remedy themselves when the toilet is flushed again.
- To fix the chain, first clean it and make sure that it isn’t too long or too short for correct positioning of the flapper.
- If the chain is kinked, it should be replaced with a ball-type chain.
- If needed, tighten the nut that holds the toilet handle to adjust the trip lever properly.
- If this does not work, the handle may need to be replaced.
- Remember to shut off water at the valve before replacing the chain or handle
Step 5: Overflow tube/water level too high:
If the water level in the tank is too high, it may continuously spill over the overflow tube, creating a large leak. The correct water level is about 1.5 to 2.5 centimetres below the top of the overflow tube.
Lower your tank water level
- Turn the float rod adjusting screw clockwise to lower the water level one or two centimetersbelow the overflow tube.
- If you have a float ball you may also gently bend metal float arms or adjust the float cup alongthe metal adjusting rod.
- Replace the screw if it is corroded or stripped.
- Flush after making adjustments to test whether the water stops at the proper level.
- Ensure the refill tube is securely inside the overflow tube no deeper than five cm (if thewater level is too low, you may not get an effective flush).
- If this doesn’t lower your water level, the float may be waterlogged and need replacing or the float assemblymay need replacing. Some toilets have a float ball, others feature a float cup, and the method for adjusting the water level varies. Check your toilet manufacturer’s website for details and instructions on your specific model.
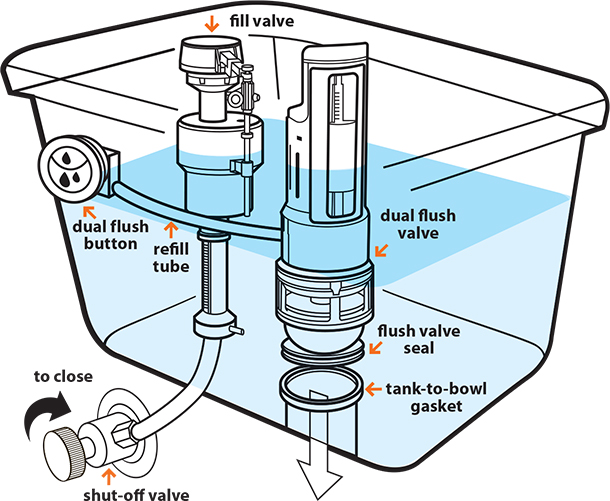
Dual Flush Toilets
A worn out flush valve seal at the base of the centre canister is usually the culprit when a dual flush toilet is leaking. Follow the manufacturer’s directions to remove old parts. Many manufacturers have repair videos on their websites, which will tell you the exact parts you need to repair your particular model. Some parts come in kits, and others are sold separately.
Before you begin repairs, remember to:
- Shut off the water supply to your toilet, which is usually located on the wall behind or beside the toilet.
- Flush the water in the tank.
Still own a high flow toilet?
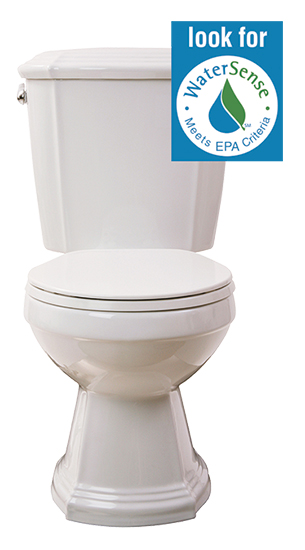
Consider replacing your older toilet with a high efficiency one that saves both water and money on your bill. An older toilet can flush as much as 13-20 litres of water per flush, compared to a WaterSense labelled toilet that uses an average of 4.8 litres per flush.
WaterSense labelled toilets include high efficiency, high performance toilets with a single flush mechanism as well as several different dual-flush models, (which use a higher volume of water for a solid flush and a lower volume for liquid flush).
You can find WaterSense labelled toilets in every hardware store at a variety of price points to fit your budget. Just look for the WaterSense logo on the box and start saving!
This information is provided for your benefit. If you do not feel comfortable making these adjustments please hire a plumber. The City of Calgary will not be responsible for any damage because of faulty repairs.